URL Shortener with Django (Part 2) - Creating a new django project
Creating a Django project
django-admin startproject urlshortener
Now you will see new directory “urlshortener”. Now our folder structure looks something like:
tutorial/
    - py3env
    - urlshortener
        - urlshortener
            = __init__.py
            = settings.py
            = urls.py
            = wsgi.py
        = manage.py
(Folder is denoted as - and file is denoted by =)
The folder “urlshortener” just inside “tutorial” is our root directory. And we will work inside this root directory from now on wards.
Let us review what are these files. “urlshortener” inside tutorial folder is Django project directory, you can rename it to whatever you like or leave it as it is. From now on wards we will be working inside this directory.
And inside “urlshortener” folder you will see “urlshortener” folder which contains our project files and we have “manage.py”.
For now let us leave “manage.py” and look into the “urlshortener/urlshortener” folder. You can see there are following files:
-
init.py - It is the file used to make python treat that this is a directory containing packages.
-
settings.py - Contains the settings for our Django project.
-
urls.py - Use to handle url routing.
-
wsgi - WSGI config for our project
You must be in hurry to see your app running. So, let us run it now.
Type the following command from your root directory (i.e the “urlshortner” where manage.py is located)
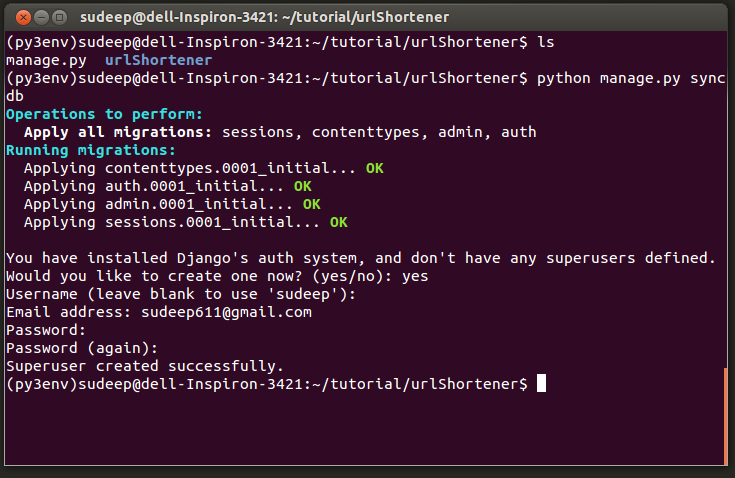
python manage.py syncdb
You will be asked to create superuser, create it because we gonna need it after some time.
Now enter the following command:
python manage.py runserver
Open your favorite Browser(mine is Google Chrome) and navigate to
http://localhost:8000 - 8000 port is default for django, you can also run it in another port by using
python manage.py runserver 5000
So now our URL will be http://localhost:5000
If you can see web page telling you “It worked!, Congratulations” then everything up to now is working fine.
Alright, This is the end of the Part 2. In this part you created Django project and ran it and it worked.
Post Series:
Part 1: Create a virtual environment and install Django
Part 2: Create a new project and make sure it works
Part 3: Create Django App, Model for our App and work with Django Admin
Part 4: Working with URLs and Views